Pony
Contents
Intro
This bike was build by Dirk Bonné in 2016, after his last python got stolen.
About me: I build the baby python; the pythoon; the stokid pythoon (tandem reusing the front of the pythoon); and a (unnamed) regular python (again using the same front-part of the pythoon). It was that last python that got stolen.
Instead of the usual 20" sized wheels I typically use in my builds, I opted for 26" wheels. Mainly, because these wheels are readily available and I wanted to try something new.
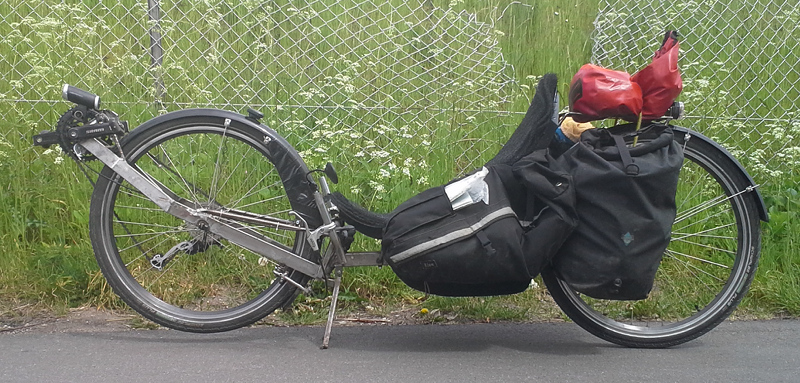
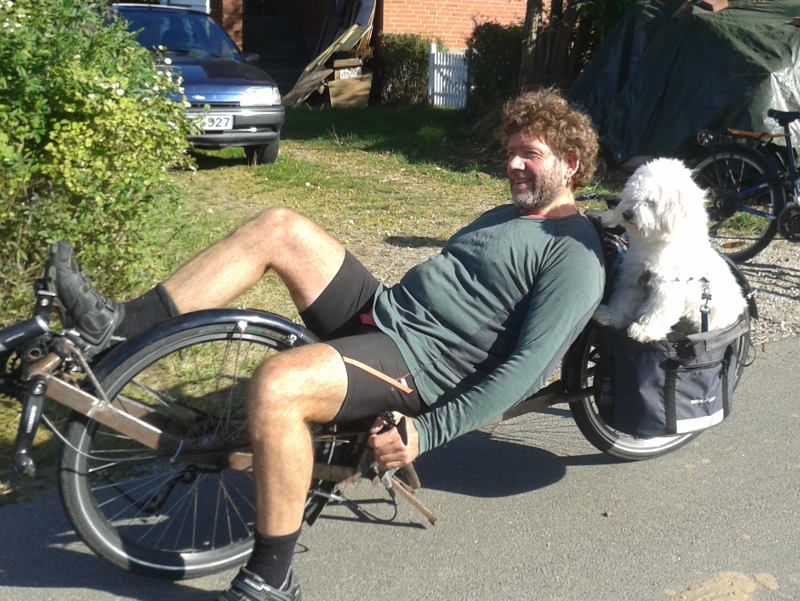
Pony on Vacation
I have been riding this bike for half a year and become fond of it. Only downside really has been some slippage of the front wheel on steep and wet roads. I belive this has to do with the higher seat position.
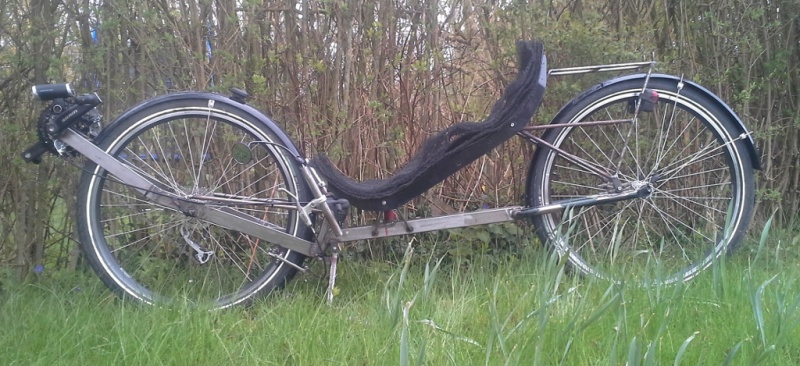
Naked Pony
As a whole the bike is more robust than light.
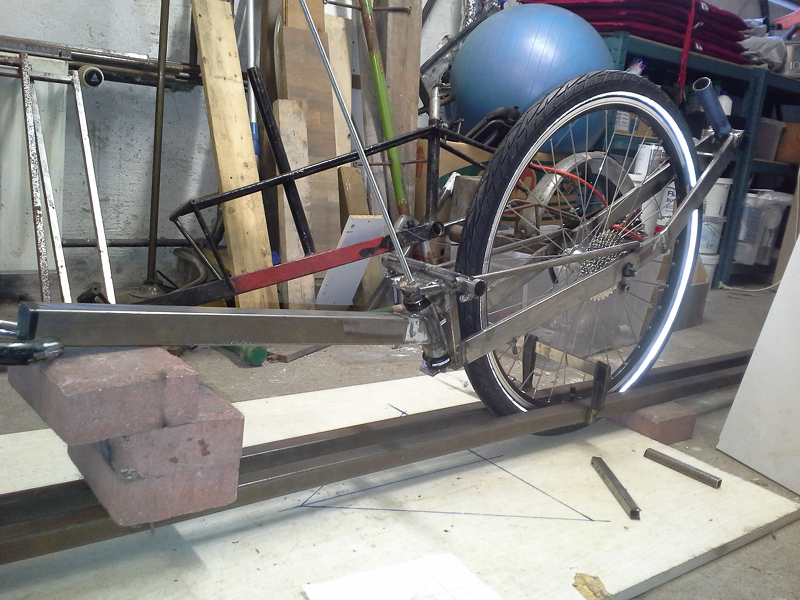
The front part of the frame is 10x40x1.5mm. The part between the wheel and the pivot is extra stiffened up using 12x1mm round tubes. To the front at the BB there is ony extra round tube stiffening the part between wheel and cranks (this one is only visible on the "vacation" picture).
The middle part is 40x40x1.5mm and the rear is just a mountain bike fork. The seat and luggage rack form together a triangle and are simple bolted together and on the bike. This allows the seat to be moved 35mm and the seat angle to be adjusted.
The luggage rack is 10x1mm round tube and it is meant to hold side panniers onto the lowest horizontal tube (the panniers are as low and near to me as possible). The top part of the rack can be used for extra luggage.
Short Legs means Short Cranks
My inseam is 78cm which would normally be a bit short for a 26" python. This was solved by cutting the cranks down to 135mm. This size I know well from my other builds and it suits me fine.
Using shorter cranks your cadence goes naturally up and therefore you can gear down. Therefore I took mountain bike sized gearing: SRAM S600 42/32/22. The advantage of the SRAM S600 is that the cranks are not hollowed out and lend them selves to be shortened. The gear ratio is so that I can still pedal (very fast) up to 60km/h.
I can really recommend shortening cranks.
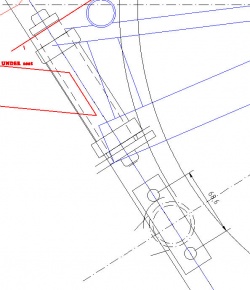
Pivot
Previously I have been using a sis BB shell, but they have a tendency for one side to unscrew. Loctite helps but I never liked that.
This time I used a headset for the pivot. A friend of mine made the necessary adjustments using a lathe.
I hope there will never be a next time, but if there is, then I will not use this solution again. It was a lot of work. I could just as well have used sealed ball-bearings and be done with it. The forces are anyway mostly radial instead of axial on the pivot of a python.
The angle used is 57.5degrees. This is rather low and might need a bit of finesse to ride well, but it is an advantage when doing very slow tight turns as it needs less force (less self centering).
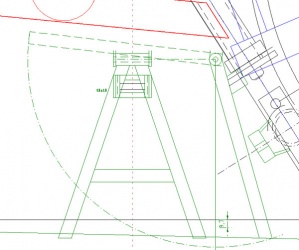
Kickstand
The best thing about the bike :)
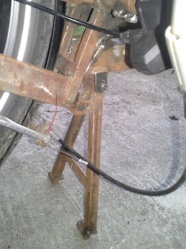
A python must stands for it self. The kickstand is the object of envy for my cycling friends who can only stop when there is a wall, pole, or tree (and where there are more than 4 cyclists there is always at least one who has to pee).
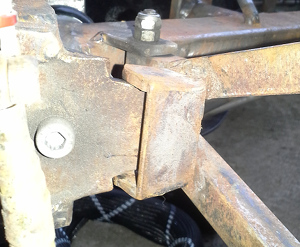
As can be seen on the last picture, the pad of the pivot has a conical tong: when the kickstand goes down, the tong is fixed between to plates and the bike is forced straight.
Under the feet of the kickstand I added two horizontal pieces, partly because the kickstands angle was too upright and partly to make a wider base so the kickstand doesn't sink in earth that easily.
One V-Brake / two Cables
I do not like a rear brake as the weight distribution of a typical python will cause the rear wheel to skid when braking. Here one v-brake is used and the brake is controlled through two cables.
Between the brake arms there is a spring that gives extra return power. This has an advantage especially in winter when brake-cables aren't running smooth through their jackets. The coil was taken from a gardening tool and does not bend when compressed.
Adjustable Seat
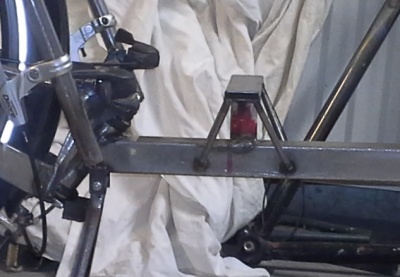
The seat is horizontal adjustable about 35mm. Furthermore the angle is adjustable (the angle I use is between 30 and 35 degrees).
A very basic system using a threaded rod through a 40x10 square tube (see picture)
Rain protection
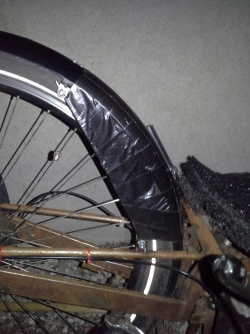
When it rains the front wheel throws up a lot of water and protection is needed if you do not want t obe soaking wet. I have used minimal protection using duck tape which works. It only covers a small part but is enough for a "dry" ride.
Adapter for the dog basket
This is more for the fun, as my dog is really eager to ride along on this bicycle! The basket is low and near to me so it doesn't influence steering.
Build It
The construction is rather simple using 40x10mm and 40x40mm tubing. Extra stiffness is added using a triangle from the pivot. The seat I bought from "cykel optimisten" here in Denmark. The seat is from the dutch company "challenge". I choose this seat because I know it fits me well and is well ventilated.

